We teachers have a special spot for classroom supplies! Fun planbooks, cute stickers, and flair pens are a few of our favorites. But a few things that top our list of favorites – things that are fun, inexpensive, and easy to use. Lucky for you, I’m sharing how I’ve mixed classroom supplies with ease and affordability with one of my all-time favorite supplies and classroom hacks – a thermal printer!

This post contains affiliate links. By purchasing an item on these sites using these links, I will receive a small commission on your purchase without additional cost to you. For more information about my Disclosure Policy, please visit this link.
Why Use a Thermal Printer in the Classroom?
I started using this incredible Bluetooth Thermal Label Printer thermal printer a couple of years ago when I began mailing out Centers in a Snap boxes. I was mesmerized at how quickly this mighty little printer was able to kick out the shipping labels. Immediately my mind started working on how I could make this work for the classroom.
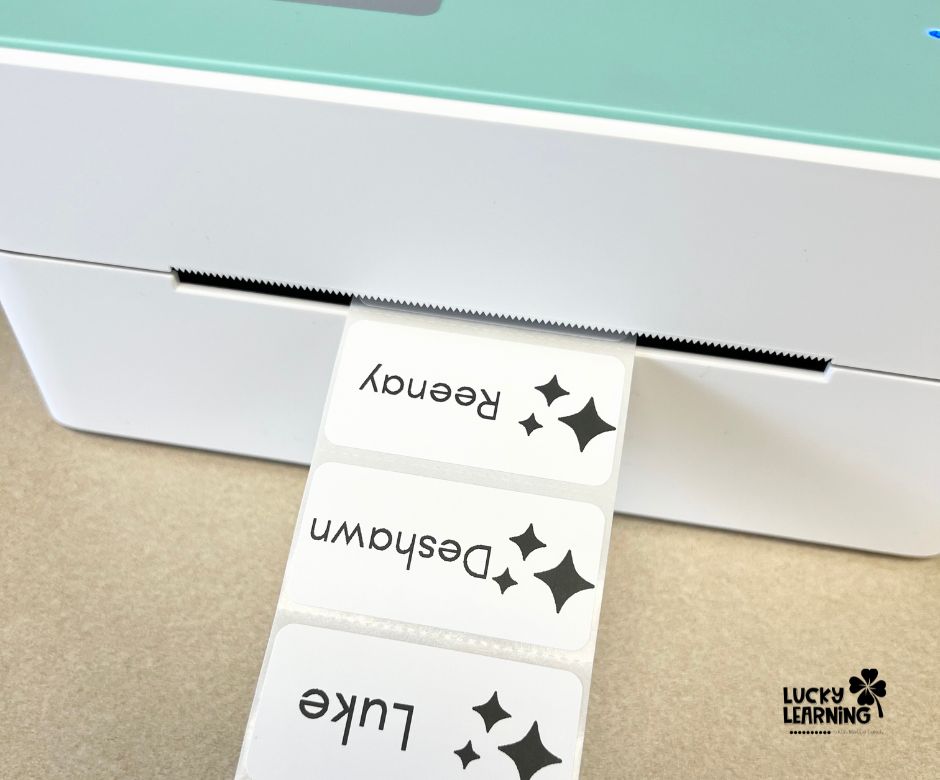
Take a peek at how quickly this thermal printer kicks out a set of class labels!
Thermal printers don’t require ink, toner, or ribbons. This means that once you purchase the printer…you never need to purchase ink! Amazing, right? It makes them the perfect label maker for busy teachers!
Since thermal printers are used in places far rougher than a classroom {think warehouses and shipping centers!} they are TOUGH and can kick out labels faster than you can imagine!
Depending on the label you purchase, they can resist water, heat, scratches, and extreme conditions without fading or smudging.
As a Teacher, What Can I Make with a Thermal Printer/Label Maker?
Well, basically anything and everything 🤣 If you can print it on a label, you can make it! The fun thing is that you can print onto labels of so many shapes and sizes. Think large rectangles, circles, flower shapes, and more.
And depending on the model of thermal printer that you purchase, you can print from both your computer and your mobile device. The thermal printer that I’ve linked in this post can print from both!
Here are just some of the things you can use a thermal printer for in your classroom:
- Subject labels
- Name labels
- Stickers
Let’s look at each below. 👇
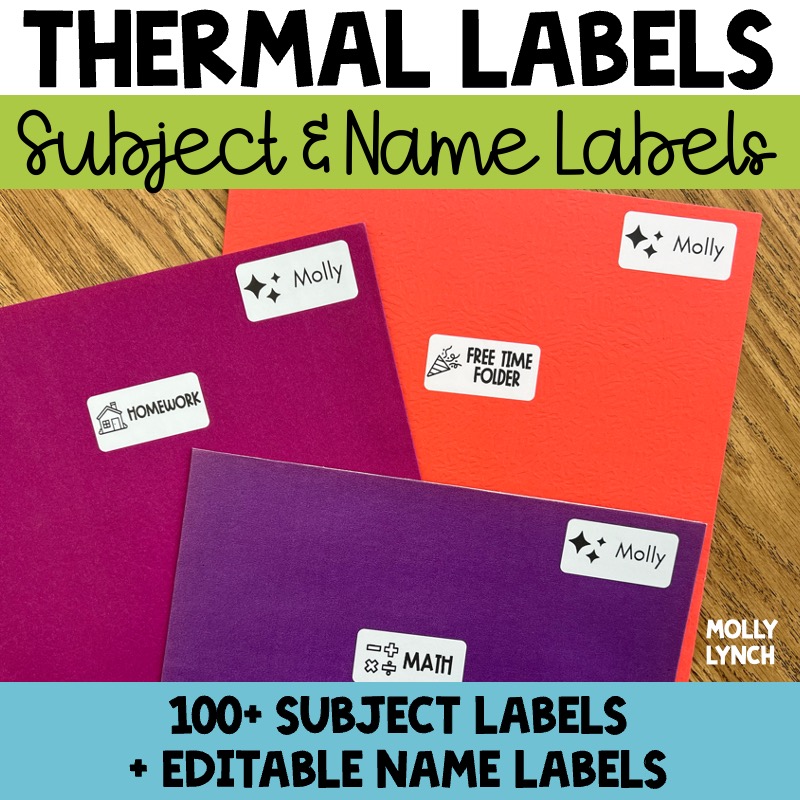
Subject Labels
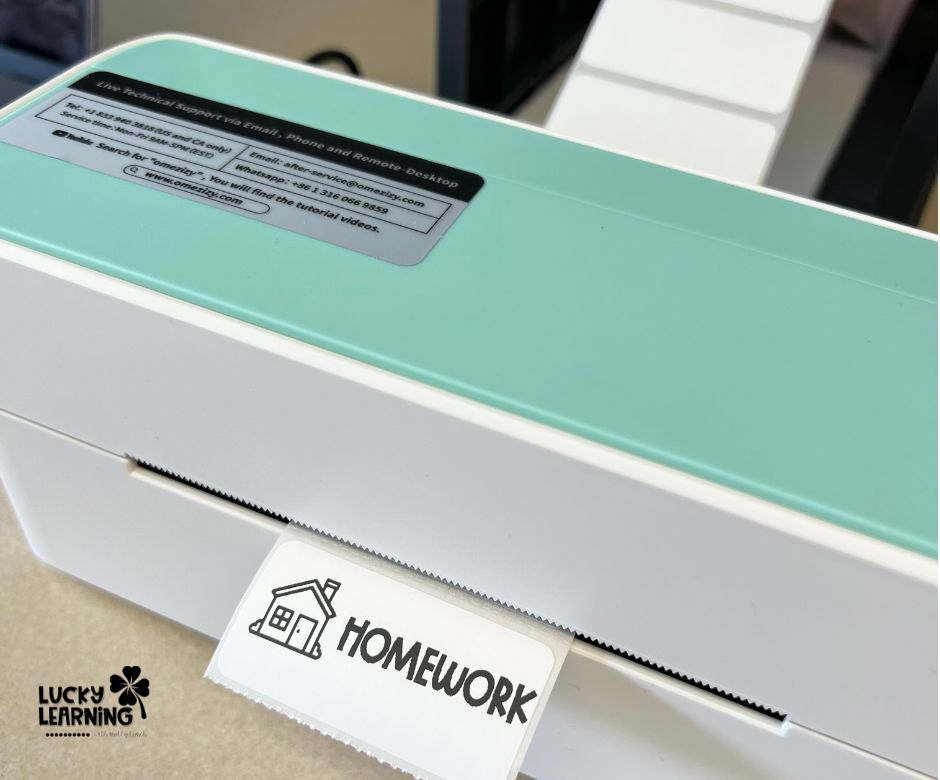
I created simple labels to use in my classroom to label everything! From folders to notebooks and everything in between.
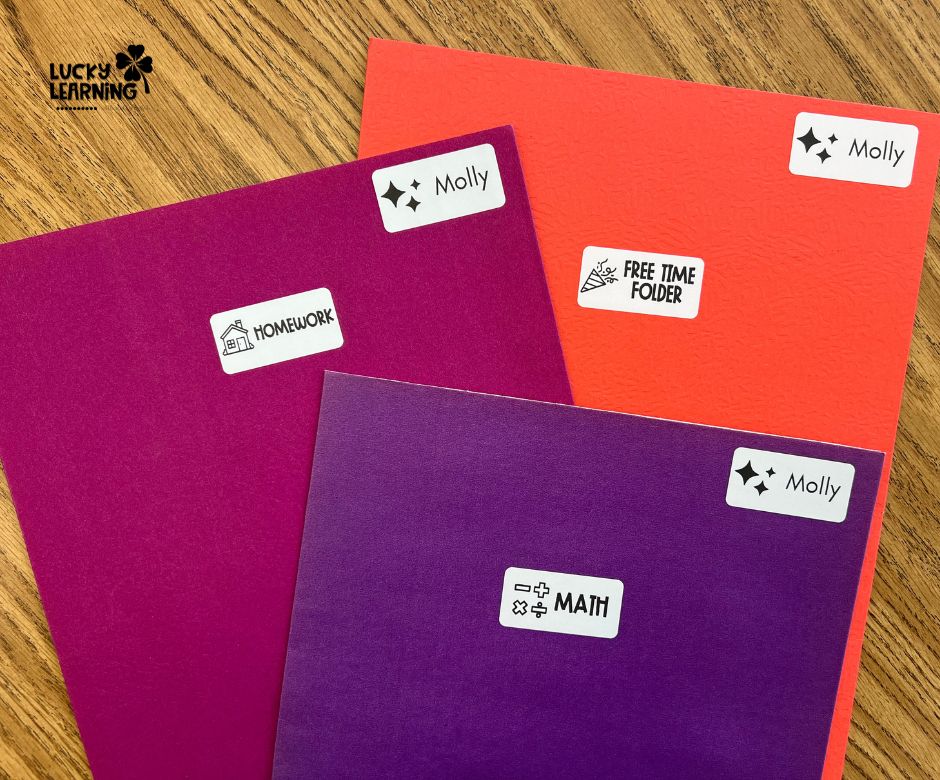
Creating these folder labels seriously took just seconds to print. These subject labels were designed to be printed onto 2×1 labels {the same size as Avery labels!} Buying this set of labels will last you for YEARS and it’s so much less expensive!
I’ve included over 100 classroom label choices in this product so you can pick and choose what works best for your classroom. And if something is missing, I’ve included a request form.
Name Labels
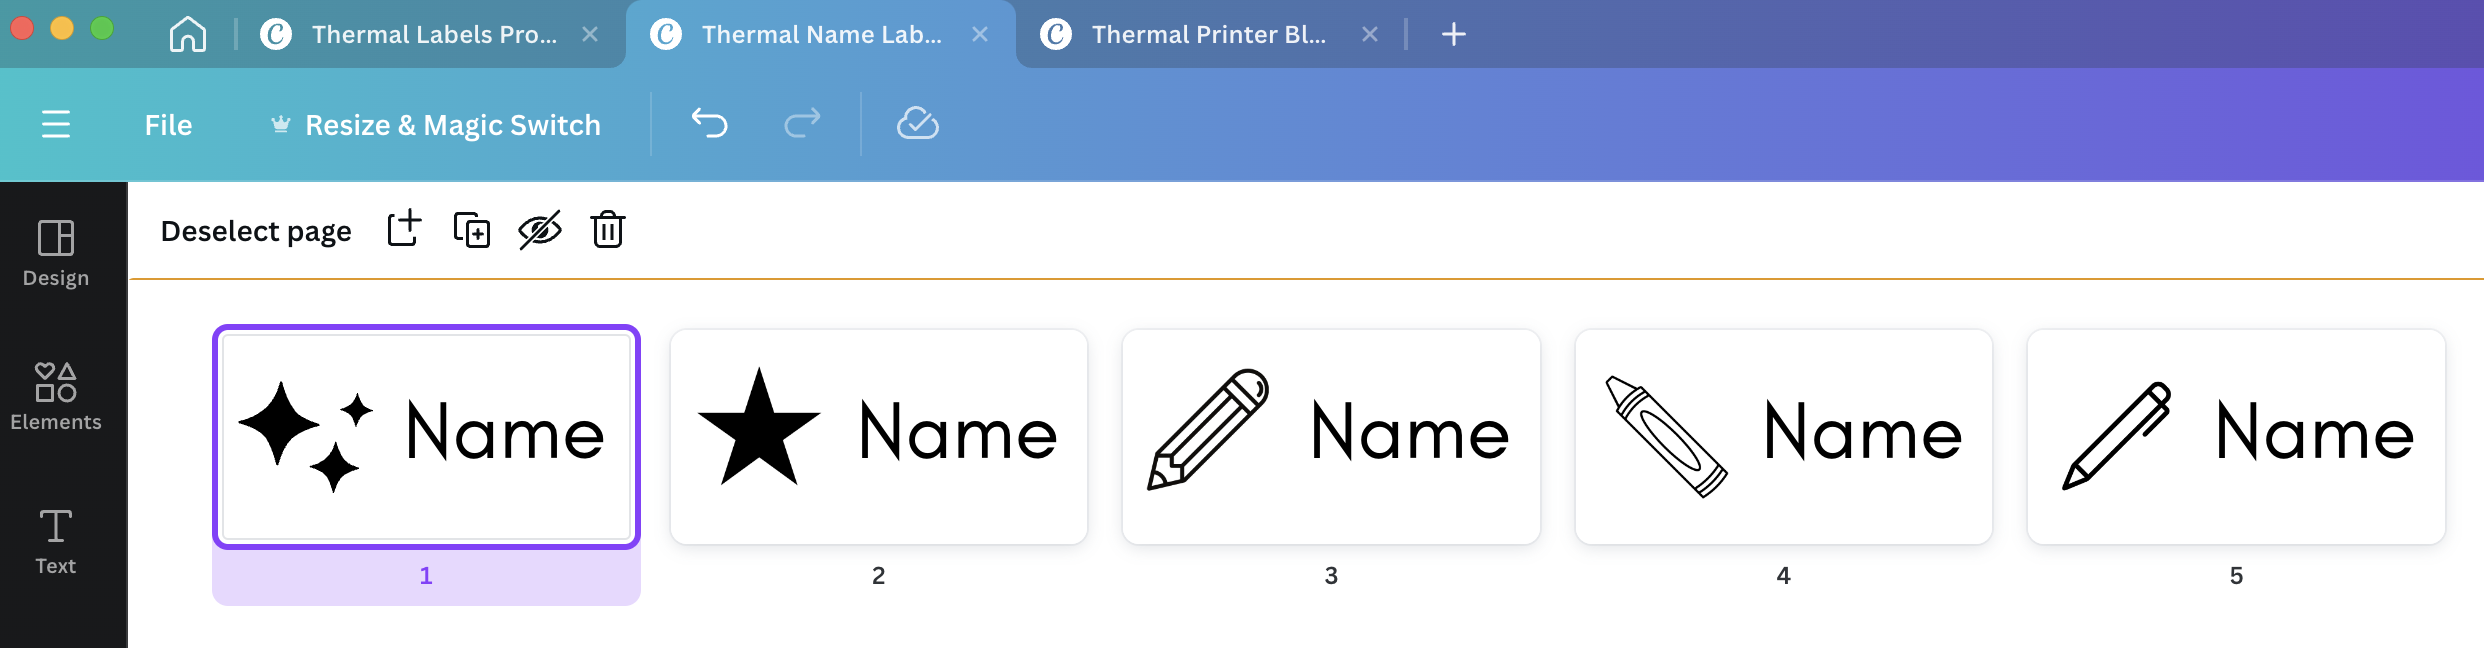
You can also use a thermal printer as a label maker to create student name labels!
I’ve included a Canva template for student names. {P.S. Did you know that you get a FREE educator account on Canva using your school email address?}
It’s easy to print a set of labels {once you save as a PDF or picture file}
You can print a whole class set of names at once or just a single name label. This is perfect for when you have a new friend join your class mid-year and you only need a few labels – not a whole class set!
Keep reading and I’ll show you how to print below.
“Stickers”
You can find SO MANY different labels on Amazon – from colored to shimmery to “glitter” to different shapes! This means that there are so many ways you can use these thermal printer stickers in your classroom.
Want me to send you this post?
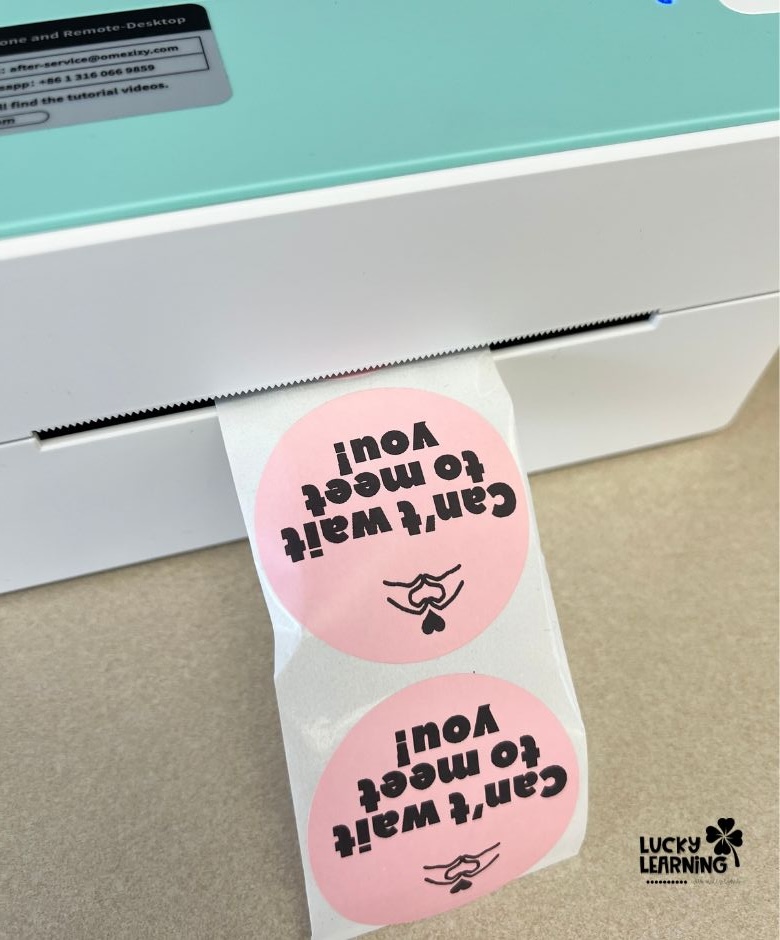
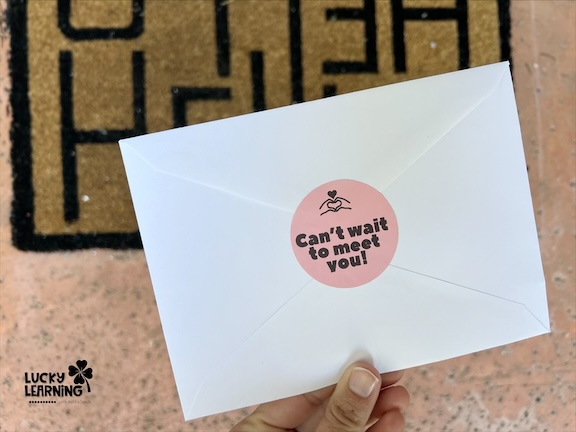
Using the mobile app for the printer I created these cute stickers to slap on envelopes to use for my beginning-of-the-year letter to students.
Want to snag the Classroom Thermal Labels? Grab them here!
What is the Best Thermal Printer & Label Maker for Teachers?
I have a couple of different printers and label makers, so let me tell you which is best for teachers.
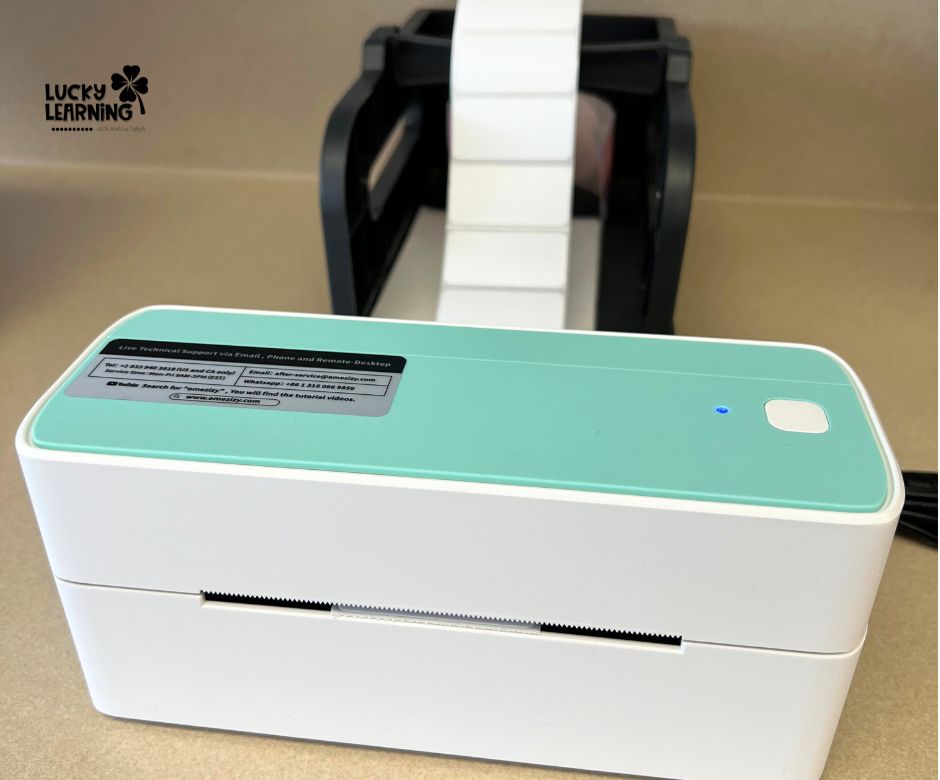
For shipping Centers in a Snap boxes, I use the Rollo printer.
But in the classroom, I’ve opted for this Bluetooth Thermal Label Printer – which is SO affordable!It works just as well and it has an app that you can create and print from using Bluetooth on your phone! It’s hands-down my pick for the best label maker for teachers. 🙌
To make life easier, you’ll want to definitely buy a thermal label holder. It’s inexpensive and will make sure your labels don’t get tangled up!
How to Print from a Computer
Okay, now that I’ve convinced you that you need a thermal printer, you’re probably wondering how to use it! I promise it is easy!
If you’re using a computer, you’ll download the driver that matches your OS {the printer you purchase will share a website you can download it from} If you have a tech person at your school, they can absolutely help you with this step, too.
How to Print Subject Labels
The subject labels are individual image files inside of a folder. You’ll open up the subject label you’d like to print.
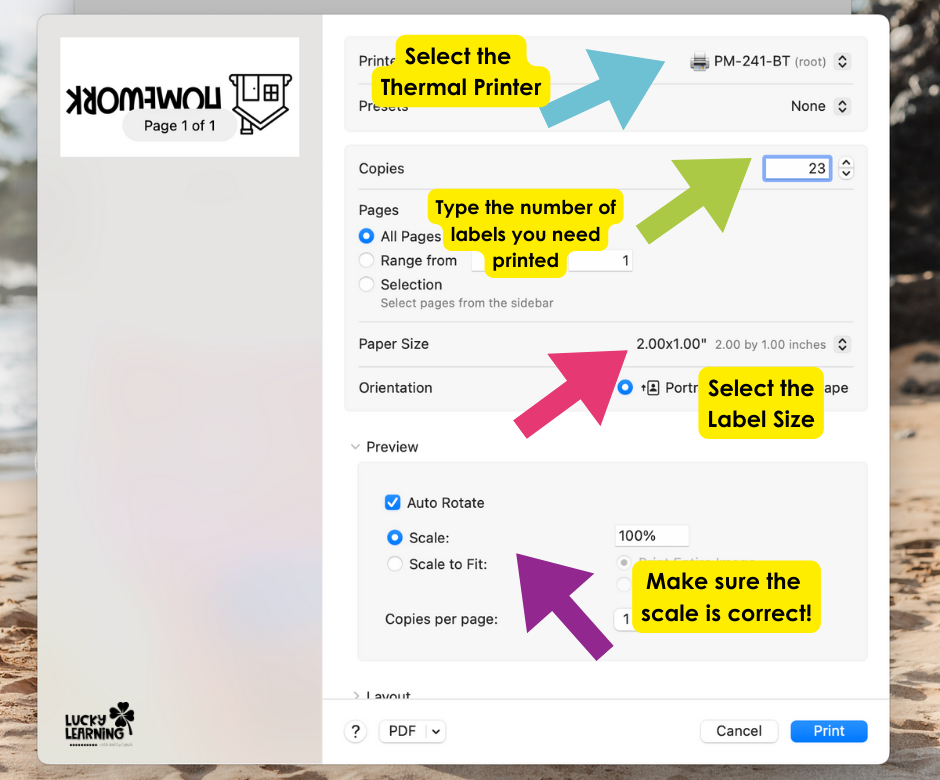
Below is a screenshot of what will pop up on a Mac printer.
- Select the Printer
- Change it to the number of labels you’d like to print
- Change the paper size {for these labels you’ll choose 2×1 from the list}
- Confirm the scale is at 100% so the entire label fits
- Print!
How to Print Name Labels Using Canva
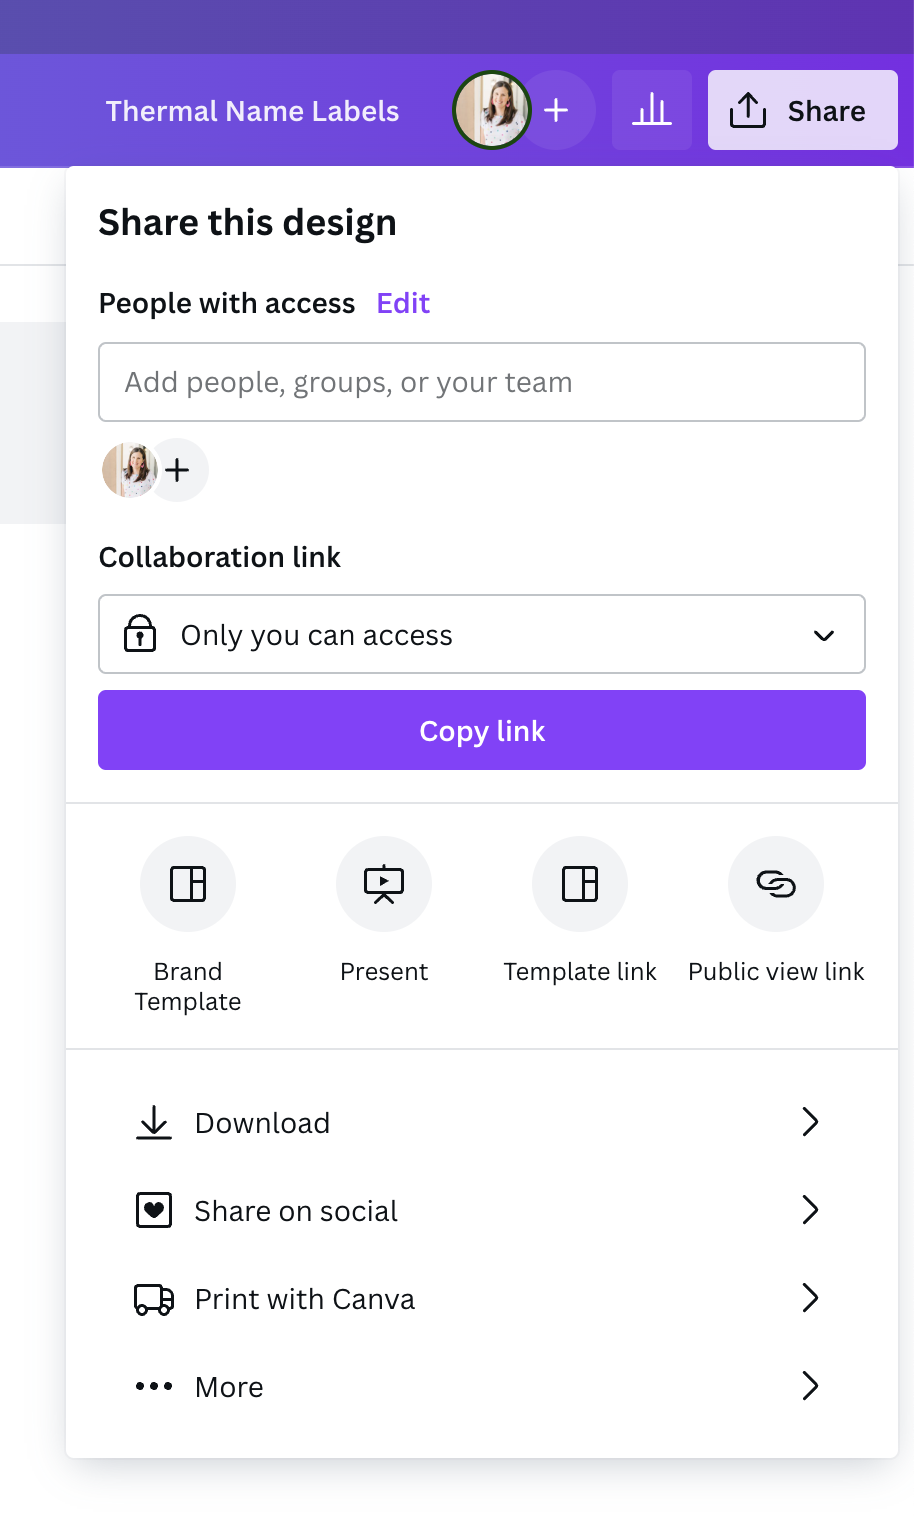
For the name labels, you’ll want to save the Canva file you’ve added your students’ name to as a PDF file. In the top right corner, click on the white “Share” button. This screen will pop up. Towards the bottom you’ll see the “Download” button.
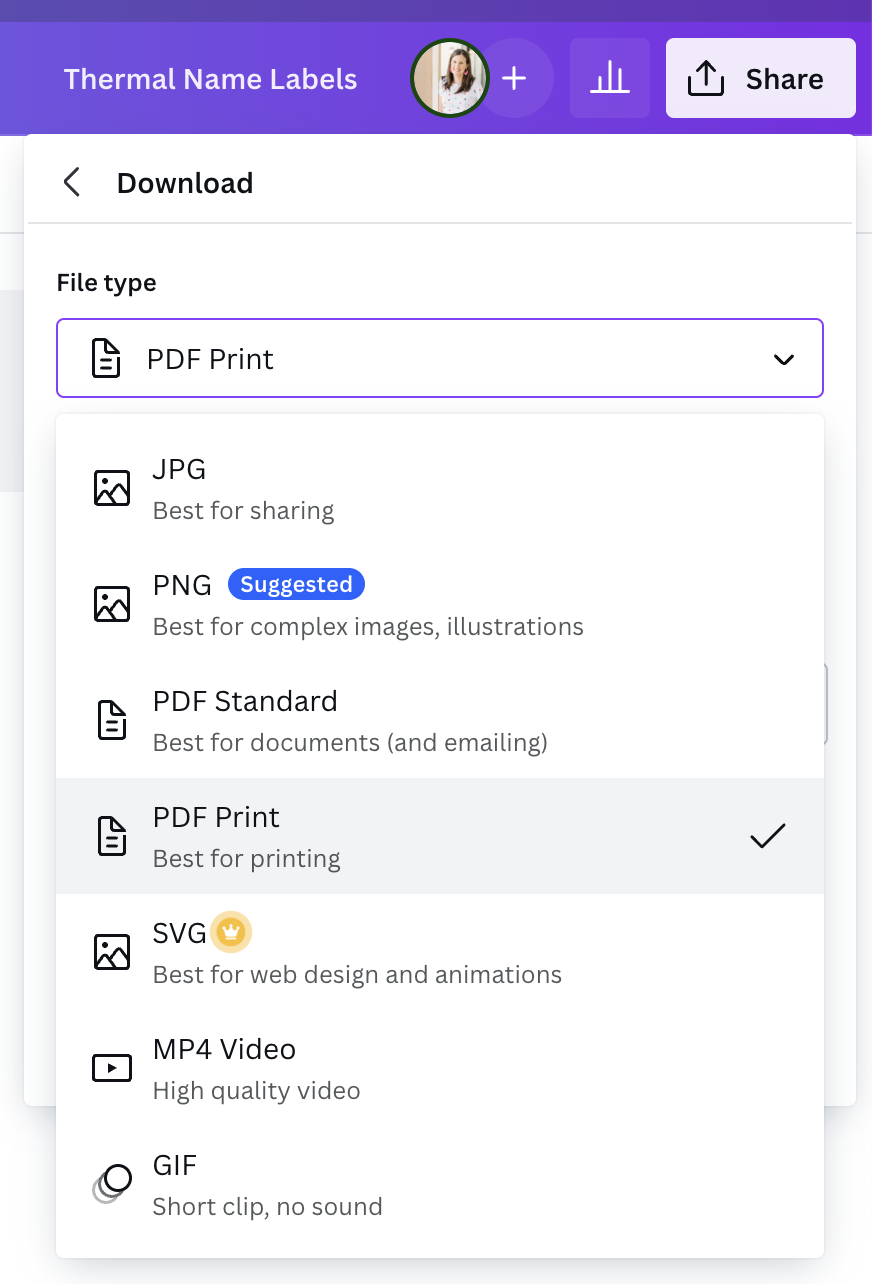
Once you click on download, this next screen will pop up. Select PDF print from the menu and save this file onto your computer.
From here, you’ll follow the same steps as printing a single label.
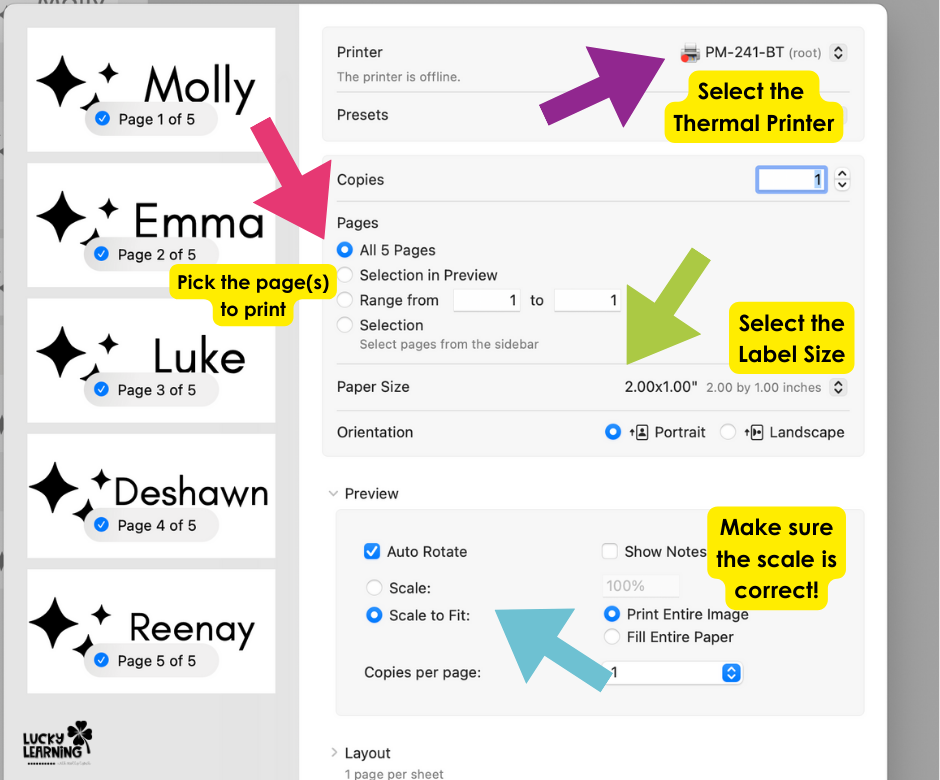
Below is a screenshot of what will pop up on a Mac printer.
- Select the Printer
- Select the pages you’d like to print {remember you can just choose one student or all students!}
- Change the paper size {for these labels you’ll choose 2×1 from the list}
- Confirm the scale is at 100% so the entire label fits
- Print!
It’s seriously THAT easy to print and start labeling! Awesome, right?
Best Thermal Printer for Teachers Recap

Thermal printers are a great, cost-effective tool for teachers to use in the classroom. They can quickly print a variety of labels, from subject labels to student name tags, without the need for ink or toner.
Thermal printers are essentially the best label maker a teacher could ever ask for, and can even handle large labels with the right printer!
To recap, my favorite label maker and thermal printer for my classroom is this Bluetooth Thermal Label Printer!
This article provides step-by-step instructions on how to set up and use a thermal printer to create customized labels for your classroom organization and labeling needs.
Ready to start using these labels in your classroom? Grab the templates here!


2 Responses
Hi! I am going to be a first year middle school SPED teacher next fall. I know I will be labeling everything in my classroom and I love this thermal printer. Where can you get refills for the smaller size of labels? Thanks!
Hi Nicole!
Yay for your new gig! You can find everything on Amazon! Here’s a link to some of my favorites for the Thermal Printer!
https://www.amazon.com/shop/luckylearningwithmollylynch/list/3A1P9M5YB2NRF?ref_=cm_sw_r_cp_ud_aipsflist_GHTHDT4HRY40ZH307R81_1